
The Brief #
My plan for this project was to use the university’s high-quality 3D printing resources to develop my previous experimentation with doll making. I wanted to design a boss character who would feature in a 2D, turn-based game, inspired by multimedia bosses found in games like Undertale and Super Mario RPG.
I would then print a base, posable skeleton and sew details over it, and stop-motion animate an introduction, idle, and death animation. I hope that with this process, I could create a doll capable of much more posing freedom than I ever had before.
I’m no specialist in animation, so I was mostly wanting to experiment with the doll creation process and explore the technical limitations of the physical-to-digital pipeline.
Narrative and Inspiration #
The core design of the character is inspired by contemporary art dolls and abstract, alien designs. I fused that with reference to Edo period Japanese clothing.
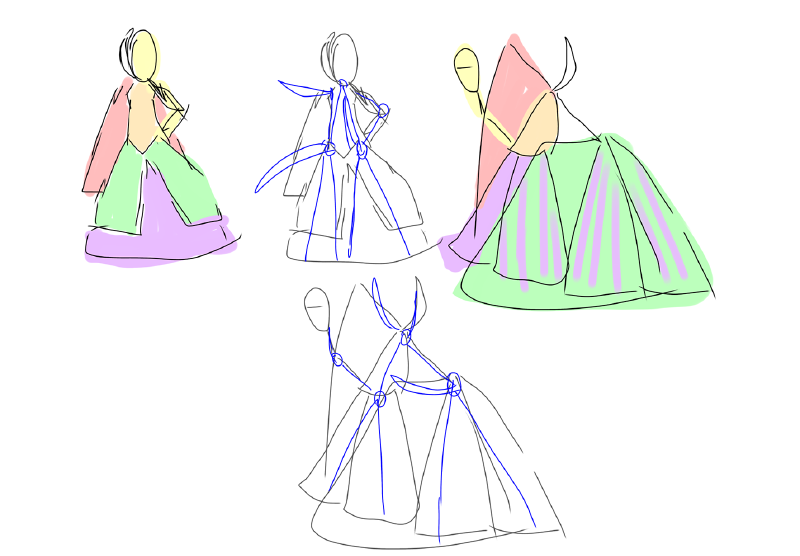
Specifically, the final design for the creature plays on the myth of the Futakuchi-Onna, a Japanese myth which has themes of gender roles, hiding emotions, and extravagance and consumption. The central elements of the design are the separated head and face, and the bifuricated skeleton, which can split the humanoid silhouette into a more monstrous one.
Skeleton Construction #
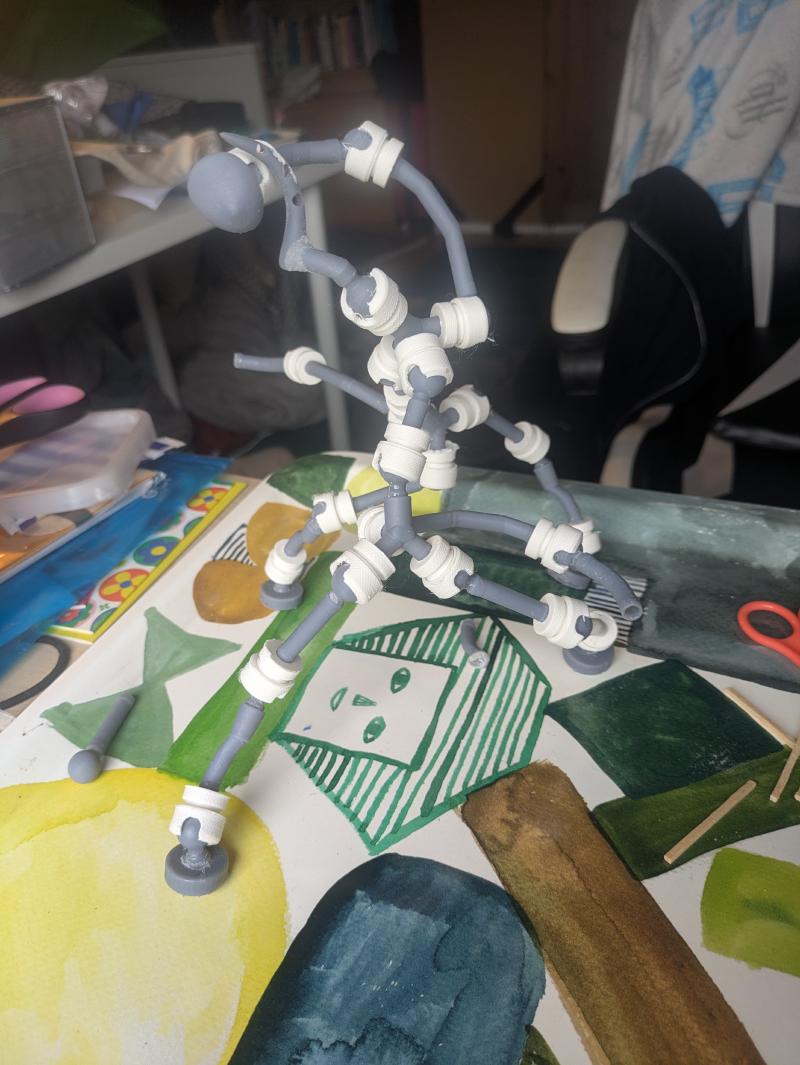
I used a modular threaded ball joint model from a stock 3D model website as the basis for the skeleton. I’d originally planned on using resin printing for it, thinking that the greater strength and precision would create very smooth joints. Ultimately, however, the threading failed on the resin print, slumping out of shape, and I went back to FDM for the joint casing.
The print turned out well enough mixing resin and FDM printing, but I can’t help but feel that this design doesn’t take full advantage of resin printing’s strengths, and would have been more suited for only FDM.
Costume #
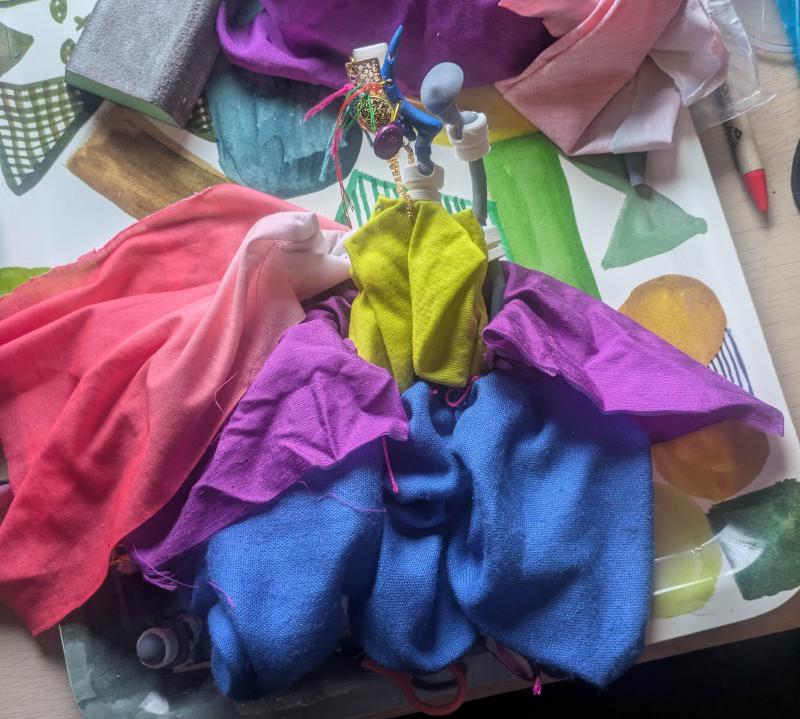
The costume was a lot of improvised drapery. I had initially picked the colours in my sketches to just be a colour code to help me keep track of the shapes and movement of each clothing element, but I ended up liking it quite a bit. The bright, yet desaturated colours combined with the grey and white to create a both poisonous and regal effect.
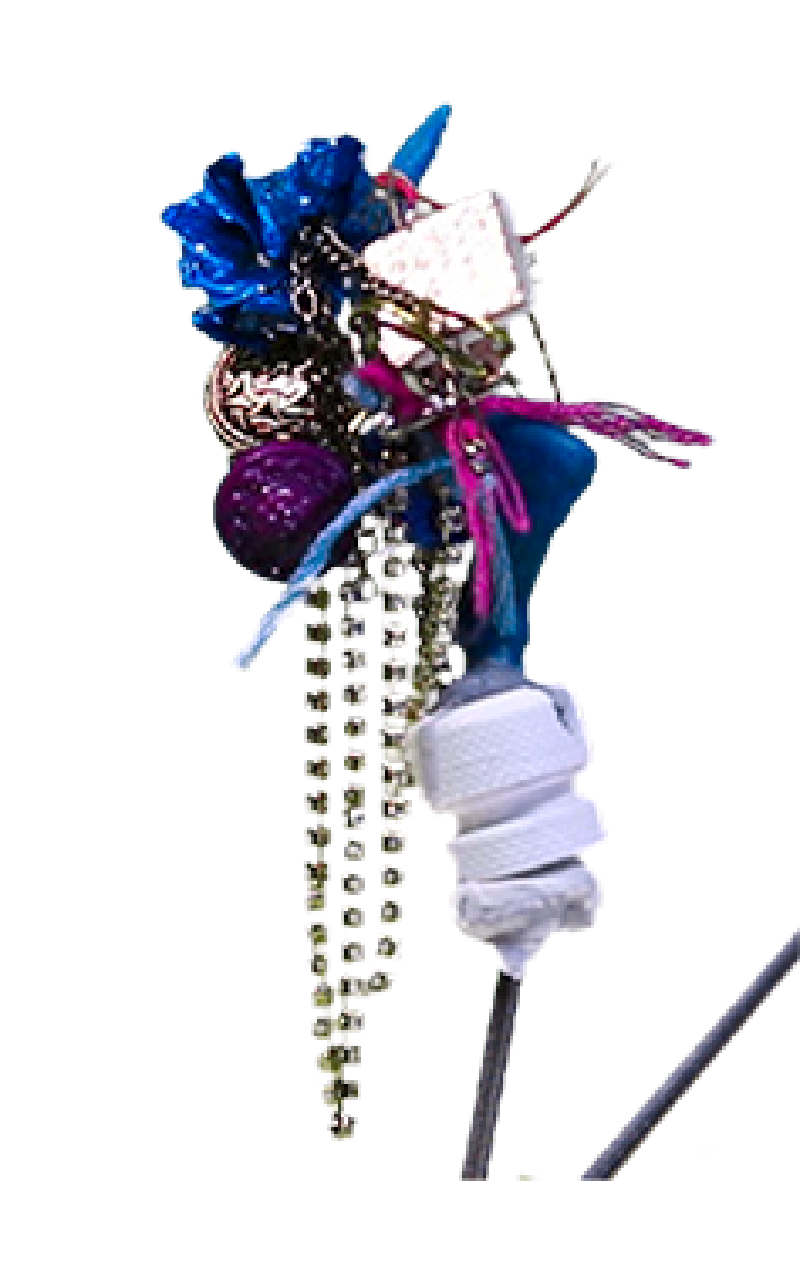
I added to that with the headdress, which I kitbashed out of buttons, broken jewelry and coloured foil. I chose my parts for interesting textures and reflectiveness and did my best to avoid using glue, preferring to tie or sew parts together. I hoped that would create a complex cumulative effect and ground the animation as they hung naturally.
While that is true in-person, the movement when animating did more to amplify mistakes and the head was a little too small on screen to be fully appreciated, especially compared to the large and significantly plainer legs.
I could have definitely done with cutting much of the volume off of those.
Final Analysis #
My biggest difficulty with the final animation was, ultimately, my core design focus - freedom of movement. No matter what the doll could do in you hands, in all stop-motion animation, every frame must be held still for the camera.
I think it boils down to using each medium for its strongest tools. The nature of digital is that change and movement is easy, no matter what physics has to say about it. On the other hand, using real materials and photography gives you massive amounts of detail for free, something that managed to use to best effect on the headdress.
Potentially, to take advantage of this, I could have photographed or scanned each part individually and animated them with puppet animation, or something similar.
In the future when I further explore these ideas, I’ll have to think about these principles carefully and focus on using each medium’s strengths to achieve the best of both worlds.